Enrolling Others in Courses

LMS Instructors, Managers, and Administrators are provided the option to enroll others in courses, either in batches or by Quick Enroll, in which individual Usernames are selected into a list. 

Feature Overview and Requirements

LMS Instructors, all Administrator roles, and managers with direct or indirect subordinates are provided the option to enroll others in courses, using Batch Enroll or Quick Enroll by individual Username.

Quick Enroll – Uses a picker to search for and list one or more usernames to be included in the enrollment. Has a limit of 100 users per transaction and processes in real time.
Batch Enroll: Uses filters similar to the User Search to build a query that finds a specific group of people to enroll. Allows unlimited enrollment and processes in the background so the user can continue working elsewhere in the system. An email notification indicates when the enrollments are completed and any that were ignored due to ineligibility.

The ability to use either Enroll Others option is scoped to the users’ profile assignments for Organization, Position and Role or their Managerial status under person-to-person reporting. An easy way to tell if you can enroll someone is the check your My Team – People page. If you use the filter option to remove all filters then search, the users you see are the direct and indirect reports you should be able to enroll.

You can only enroll others in courses that have been shared to their Business Unit’s course catalog.


 

Step by Step Procedure and Field Description

Search Courses

  1. Go to the Navigation page> Catalog Search or to the Administration page > Catalog > Courses
    Note: The steps in this document follow the Navigation > Catalog Search option available to any administrator, instructor, or manager.
  2. Filter as needed to find the desired course.
  3. Click Search. The system will display matching results. 
  4. From results list, click Enroll Others
    In the administrator’s view of the catalog, this will be a button at the right of the list.

    In the responsive Catalog Search, it will be an Action button on the Course Slide-In.
  5. There are two options for enrolling other from the Enroll Others page. Expand the sections below to see the steps for each option.

Enroll Others: Quick Enroll Process

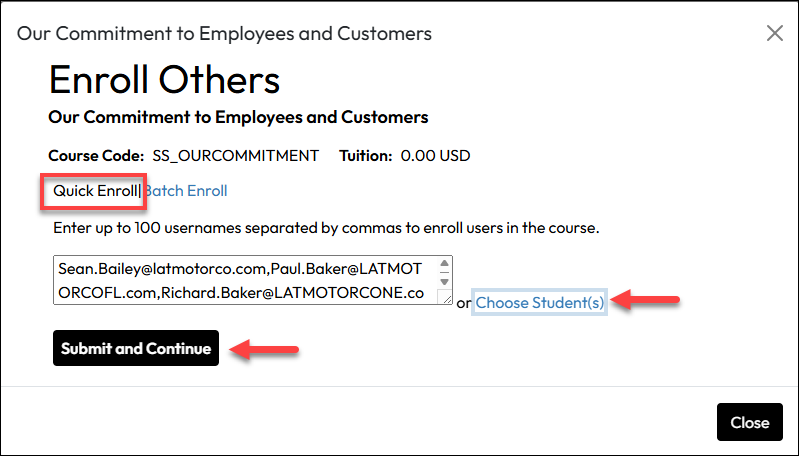
  1. To enroll students in real time, enter one or more Usernames separated by commas, or use the Choose Students link to open the User Picker. The User Picker allows you to filter by Name, Organization, Position, Role, or User Group to compile a list of students you want to enroll. 
    Note: if you manually enter the username in the field, you must use the precise username, not first and last name.
  2. Click Submit and Continue to proceed. 
    Note: Close will end your Enroll Others effort.
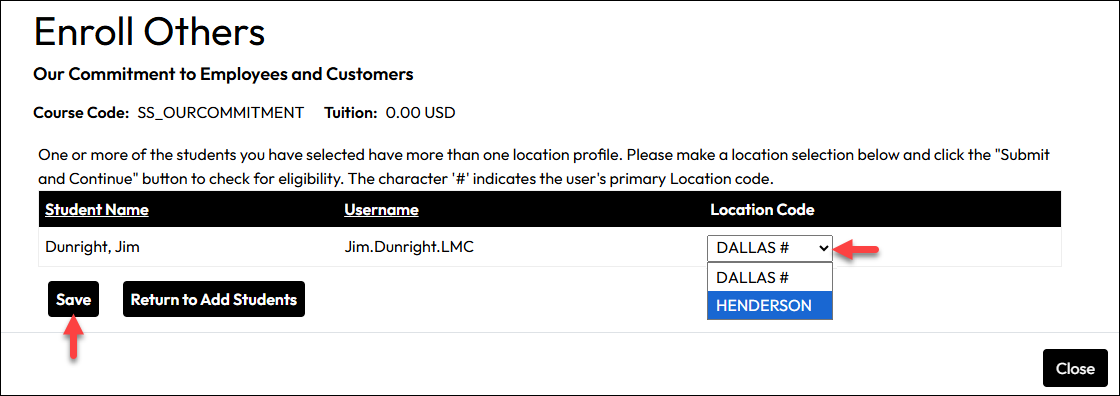
  3. If any of the students you select to enroll have more than one Location assignment, the system will prompt you to choose which Location the student should be enrolled through. The number sign (#) indicates the user’s primary profile assignment. Click Save to continue.

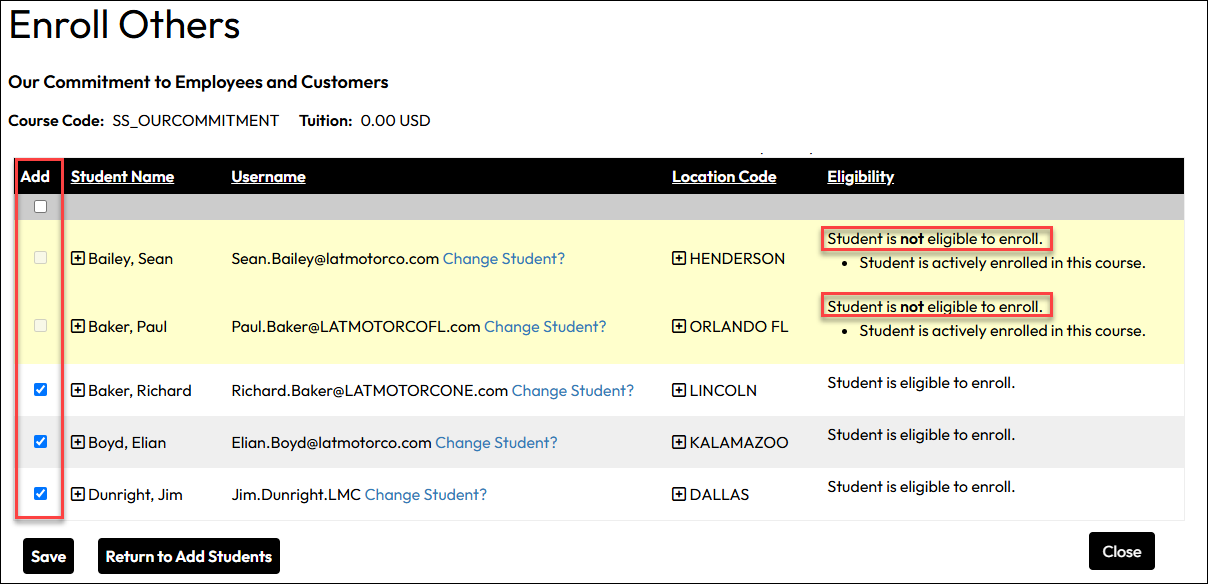
    The system then checks each user’s eligibility to enroll, and will provide information about any enrollment conflicts.
  4. Under the Add column, check or uncheck the boxes to confirm which users you want to enroll. Click the Change Student? link to swap one student for another, or click Return to Add Students to make further revisions to the list. You can also click the “+” symbol next to a Student’s Name or Location Code to expand their position and location details.
  5. Once you have finalized your selections, click Save to complete the enrollment process.

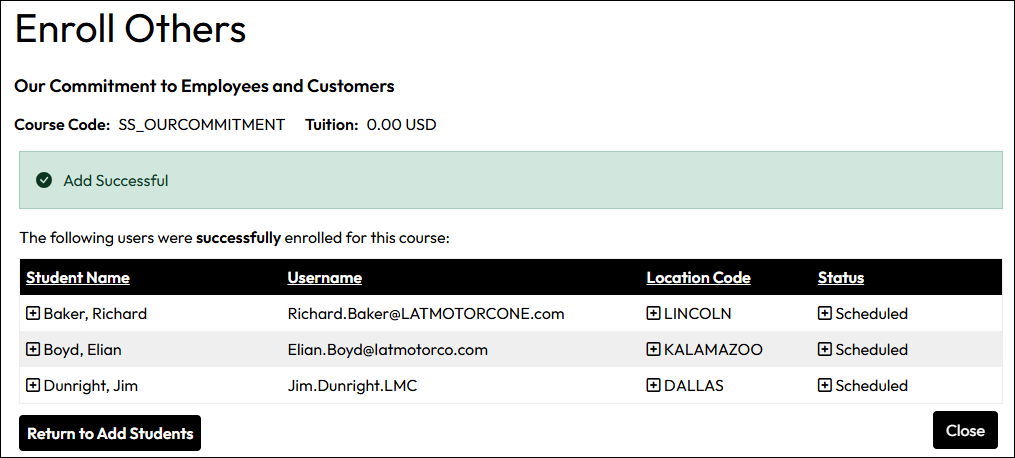
The system will notify you that the mass enrollment has been processed with an “Add Successful” message and updated student enrollment status. Click Close to exit the pop-up.
Enroll Others: Batch Enroll Process

For enrolling large groups of users, use the offline (asynchronous) batch processing option. The Batch Enroll process works by allowing the administrator to define targeted users via the Advanced User Search tools and then directing the system to manage the enrollment based on instructions given to help it determine how to treat various enrollment conflicts.
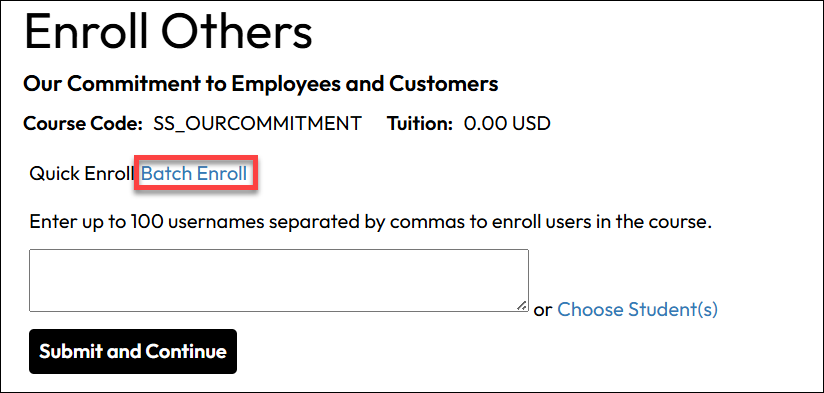
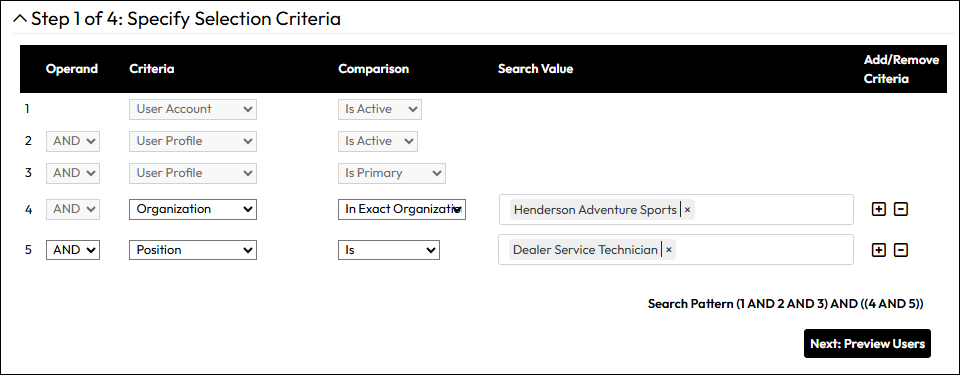
  1. On the Enroll Others tab, click the Batch Enroll link.
  2. Select the appropriate Criteria, Comparison, and Search Values to define who you want to enroll in the course, and then click Preview Users at the bottom of the page.
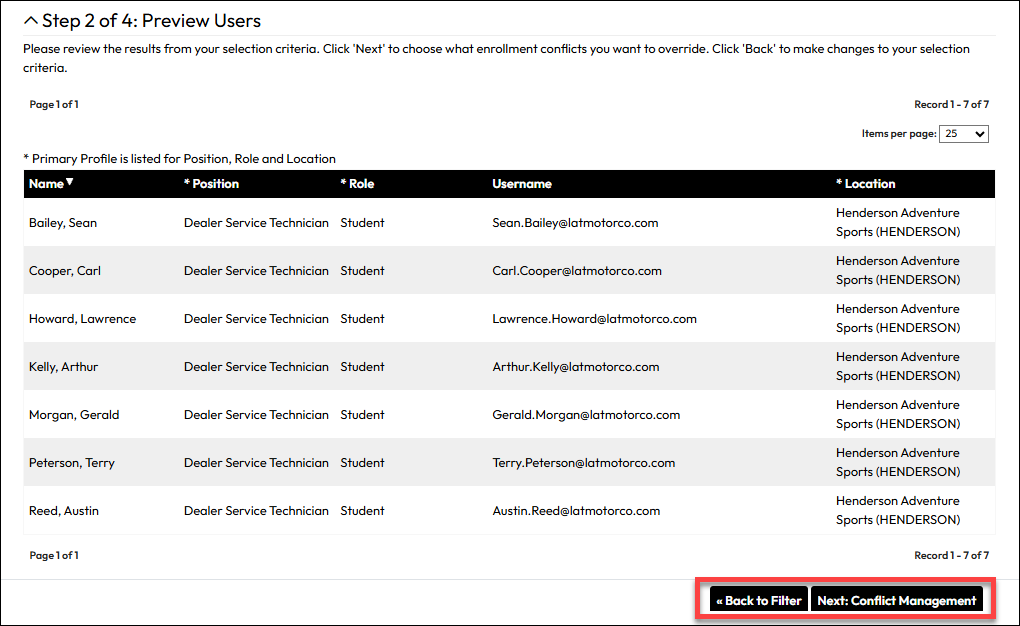
  3. On the Preview Users page, review the list of targeted enrollees. If they are correct, click Next: Conflict Management at the bottom of the page. If they are not correct, click Back to Filter to return to the audience criteria (filter) page and refine your search.
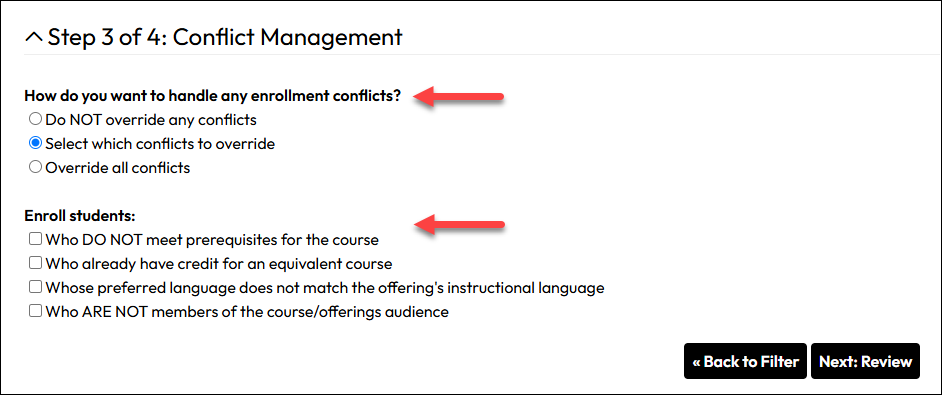
  4. When the Conflict Management page appears, decide how you want to manage potential enrollment conflicts for each user. Once you have made the desired selections for conflict management, click Next: Review.
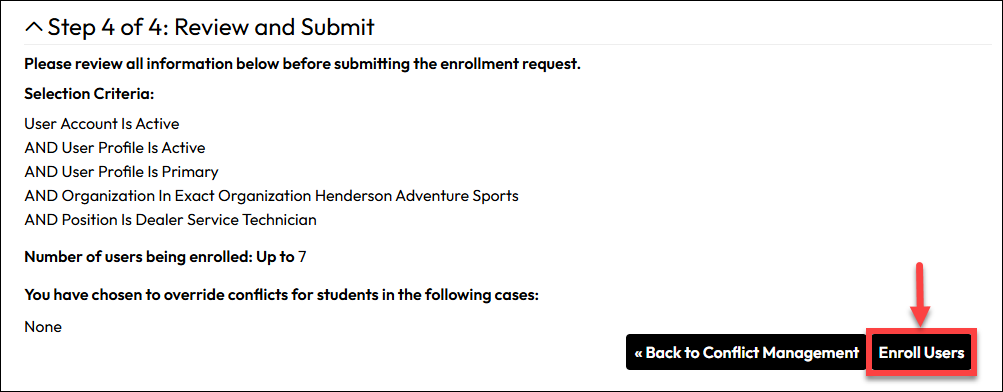
  5. On the Review and Submit page, review your selections. If everything is set for the intended enrollees, click Enroll Users. Otherwise, you can click Back to Conflict Management to return to the conflict management page and change your selections for overrides.
  6. Upon successful submit, a processing confirmation message is displayed. You will be notified via email and/or LMS Mail Center when the enrollments are complete.

Important Notes

  • Users will be enrolled in the course via their primary profile.
  • Be patient with the notification; if you have enrolled thousands of users, it might be a little while before you are notified of the completion of the process.
  • When you receive the notification, it will list all users successfully enrolled, those who are ineligible for enrollment, and anyone who could not be enrolled. 
  • The LMS will notify students of their course enrollment via email and under the “Mail Center” section of their homepage. The course in which they are enrolled will also display on their homepage, under the “Self-Studies” section.