Using the User Experience Page

The User Experience page combines the branding options for organizations and positions groups into one spot, allowing administrators to see what is customized and how customizations are inherited so that they manage existing or new customizations easily and with clarity of the big picture.

Feature Overview and Requirements

The User Experience (UX) Customization page gives portal administrators the ability to manage all branding and visual elements from a single place in the LMS. 

It consolidates all portal-level, organization-level, and position group-level customization settings. This includes customization of elements such as What’s New, My Learning, Left Navigation, Login, Registration, Stylesheet, Header Logo, Certification Logo, and Learning Path – similar in effect to the original Branding options, but improved and easier to manage.

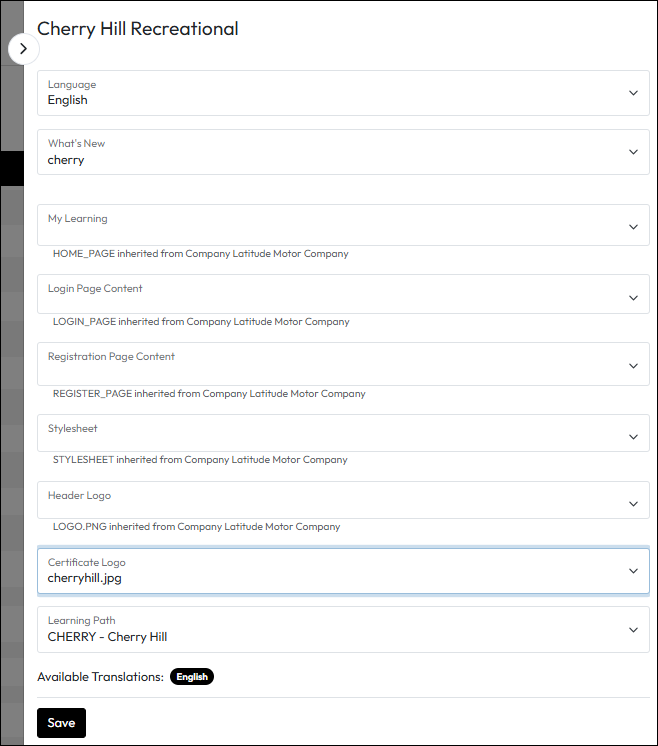
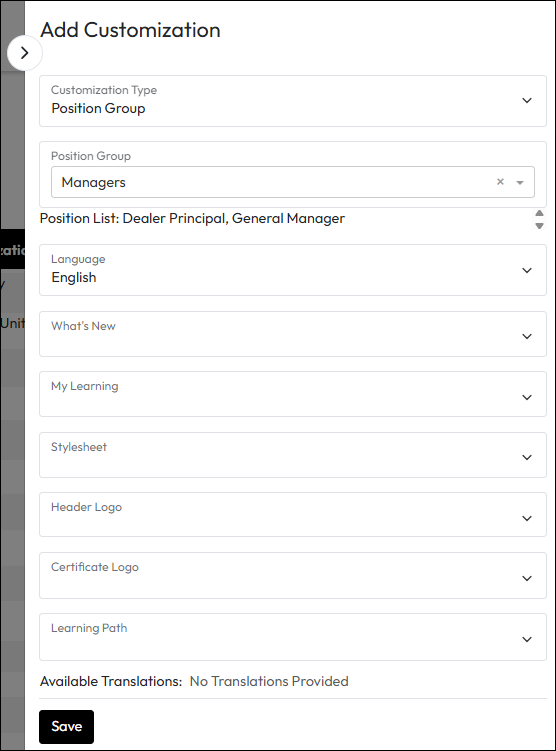
From this page, Administrators can add new UX Customizations or edit existing ones. When modifying portal, organization, or position group settings, the page will display both inherited elements and those explicitly defined for the selected entity. Administrators can easily update individual elements using drop-down selections. 

For organization-level customization, the add/edit interface will show the parent organizations for context. Similarly, for position group customization, the interface will display all positions included within the group. 

At this time, the Branding section of the Portal Information page and the Branding tabs on Organization and Position Group settings is retained, but we recommend customers begin using the consolidated page going forward. These tabs and sections may be deprecated at any time. 

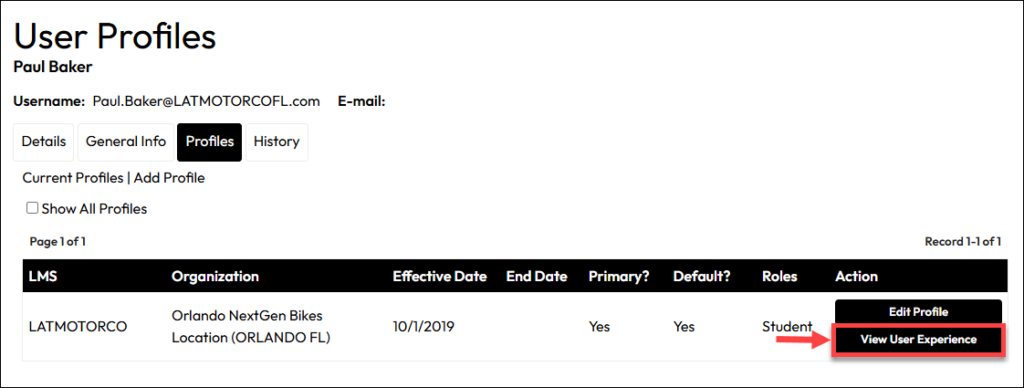
Built in tandem with this page, there is also an option available in User Search results to View User Experience Customizations. This makes it easier for an administrator to see how a specific user is inheriting the branding that they see. 

Step by Step Procedure and Field Description

View the User Experience Customization Page

  1. From the Administration menu, select Site Management> User Experience
  2. The page elements are described below. As noted on the page, Position Group customizations always take precedence of the organizational customizations a learner may be subject to.
    1. Add Customization: Opens a slide-in page to add a new customization to an organization or position group. It can be a target which has no current customizations or one which already appears on the customized list. Any customizations to entries that are already customized will simply add to or replace values.
    2. Code: The code of a customized organization. Position Groups are not represented by codes and will show no value in this column.
    3. Organization/Position Group: The name of the customized entity.
    4. Customization Type: Identifies whether the entry is a customized position group or specific type of organization level.
    5. Action – Edit Customization: Opens a slide-in to allow modifications to the selected entry.
    6. Action – Delete Customization: Deletes customizations at the selected entry after confirming the irreversible action in a pop-up.

Customizations to an Organization Level

  1. From the Administration menu, select Site Management> User Experience.
    Continue by selecting a tab below to either Add or Modify a User Experience setting.
Add Customization to an Organization
Modify an Organization's Customization
  1. Click or tap +Add Customization.
  2. In the resulting slide-in, choose Customization Type Organization.
  3. Organization: Select the organization for which you want to add the customization. This is when all the remaining fields appear.
  4. Language: Select the language tied to your customization. An English version must be saved prior to updating the content for other languages.
  5. For the remaining fields, use the drop down to select the custom content file to be used in that field. They are not required; only update the items that should be different from the organization level above it.
  6. When finished, click or tap Save.

  1. Find the organization in the list and under the Actions column, click or tap the Edit Customization button.
  2. In the Language field, if you are changing customizations in another language, select the language the changes will be made for.
  3. For the remaining fields, use the drop down to select the custom content file to be used in that field. They are not required; only update the items that should be different from the organization level above it.
  4. When finished, click or tap Save.

Customizations to a Position Group

  1. From the Administration menu, select Site Management> User Experience.
    Continue by selecting a tab below to either Add or Modify a User Experience setting.
Add Customization to a Position Group
Modify an Position Group's Customization
  1. Click or tap +Add Customization.
  2. In the resulting slide-in, choose Customization Type Position Group.
  3. Position Group: Select the position group for which you want to add the customization. This is when all the remaining fields appear.
    Note: The positions that make up the Position Group are displayed for your convenience.
  4. Language: Select the language tied to your customization. An English version must be saved prior to updating the content for other languages.
  5. For the remaining fields, use the drop down to select the custom content file to be used in that field. They are not required; only update the items that should be different for this position group.
  6. When finished, click or tap Save.

  1. Find the Position Group in the list and under the Actions column, click or tap the Edit Customization button.
  2. In the Language field, if you are changing customizations in another language, select the language the changes will be made for.
  3. For the remaining fields, use the drop down to select the custom content file to be used in that field. They are not required; only update the items that should be different for that position group.
  4. When finished, click or tap Save.

View a User’s Customizations

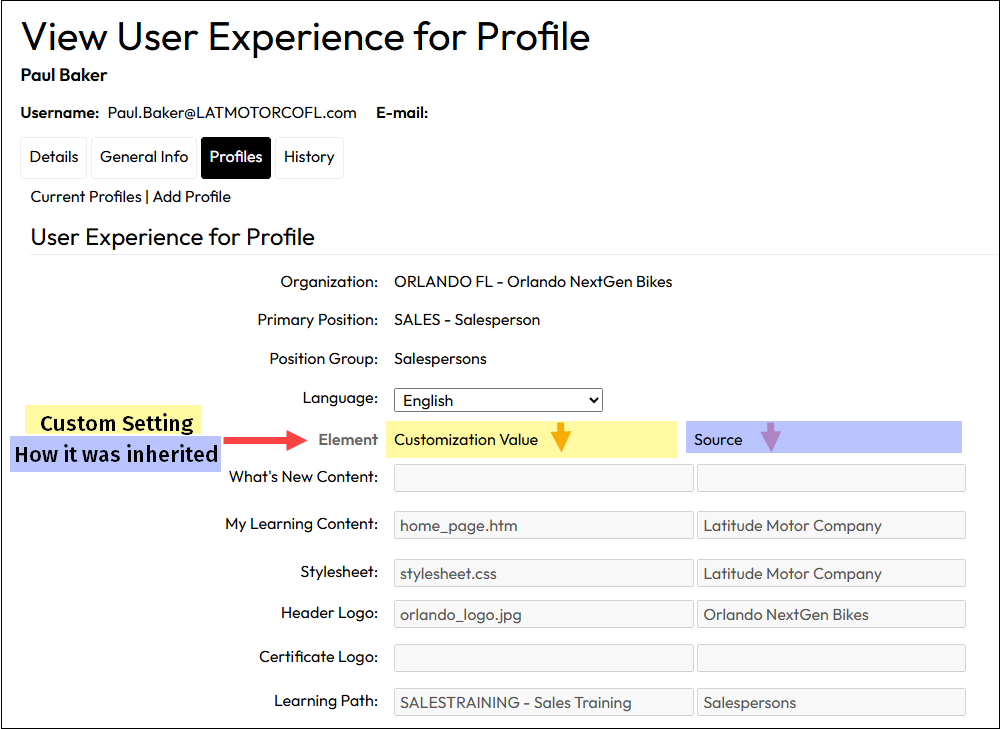
When you need to understand why a particular user is seeing a certain user experience, it can help to see how they are inheriting branding and customizations in one place. The View User Experience option under a user’s Profiles tab can do just that. If the selected profile is:

  • their primary/default profile, the experience is what they will normally see when they log in.
  • a secondary profile, it will be their experience if they switch profiles to that secondary profile.
  • an upper level profile at the company, business unit, or division level, the option to view customizations is not available.

To view a user profile customization settings:

  1. From the Administration menu Users section, select Users.
  2. Search the user for whom you want to view their customization inheritance.
  3. For that user, click Edit User Profile at the top or in the Action column next to their entry in the results list.
  4. On the User Profiles tab list of profiles, click View User Experience for the profile you want to review.
  5. The View User Experience for Profile displays, showing the customizations and their source for that specific profile.
  6. Click the Profiles tab or Back in your browser to return to the Profiles list.