Report Writer: Accreditation Entity Reporting

The Report Writer uses different reporting entities to pull data from specific places in the database. On this page, learn about the Accreditation Reporting entity, which is tied to Accreditation and Accreditation Goal data and is useful in tracking progress on required training for your learners.

About the Accreditation Entity

The Accreditation entity in Report Writer is pulling results based on Accreditation progress and the Accreditation goals, course, user, and organizational data that is commonly tied to Accreditations. 

An important thing to understand before you begin is the difference between Accreditations and Accreditation Goals. 

  • Accreditations are established requirements that must be completed in order to attain an accreditation. They, by themselves, are not assigned to anyone and if no goal is use to make the assignment, people may not even be aware there is an accreditation requirement for them. It is also possible for someone to passively achieve the accreditation by simply taking all the relevant coursework with no goal at all. The accreditation status for a user is simply Achieved or Revoked.
  • Accreditation goals actually assign the accreditation and all of its coursework requirements to the relevant users.  The goal tracks the stages of achievement from Assigned to Achieved or if lost due to requirement changes, to Revoked.
  • An Achieved Accreditation goal normally means an Achieved Accreditation.

It is a great entity to select if you want want information related to:

  • Users’ Accreditation achievement or revocation status
  • Accreditation Goal status
  • Which rule or person assigned someone the accreditation goal

It is not the best option if you want:

  • A list of all your accreditations and their configuration settings
  • A list of all your users and their configuration settings
  • Information about courses and completion status, even if they are part of the accreditation requirements
  • Information about course goals
  • Information about people who have NEVER been assigned an Accreditation and have no Accreditation history

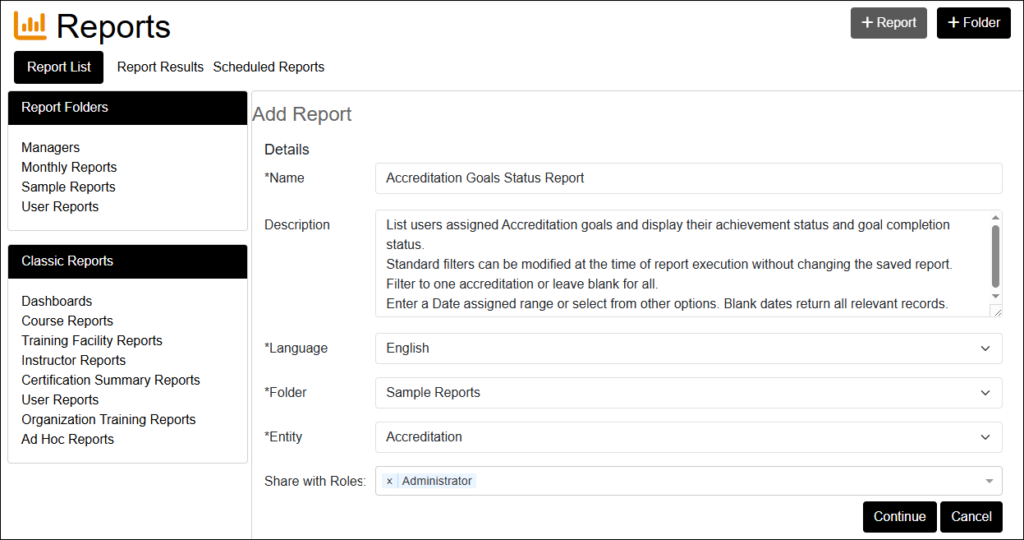
This page will show you how to create a simple Accreditation Goals Status report. 

Build an Accreditation Entity Report

Before Your Start

Make sure you understand the general basics of report writing by reviewing Using the Report Writer page. It is also linked in the Useful Links section to the right. This will give you useful details about filters and columns that will not be fully repeated here.

Before writing a report, you should first identify what data you want to extract so that you can consider what needs to be flexible for report runners, what needs to be a permanent filter, and which columns and sorting will provide the best view of the data.

  • Are you interested in Accreditations regardless of goals or do you want to see data about both?
  • Are you interested in all statuses or just specific ones?
  • Is the report supposed to be flexible depending on who runs it or hard-coded to report on specifics that will never change?

The expandable sections below go through each section of report building. Refer to the overall Using the Report Writer document in Useful Links for additional general details about each section.

Add Report Details

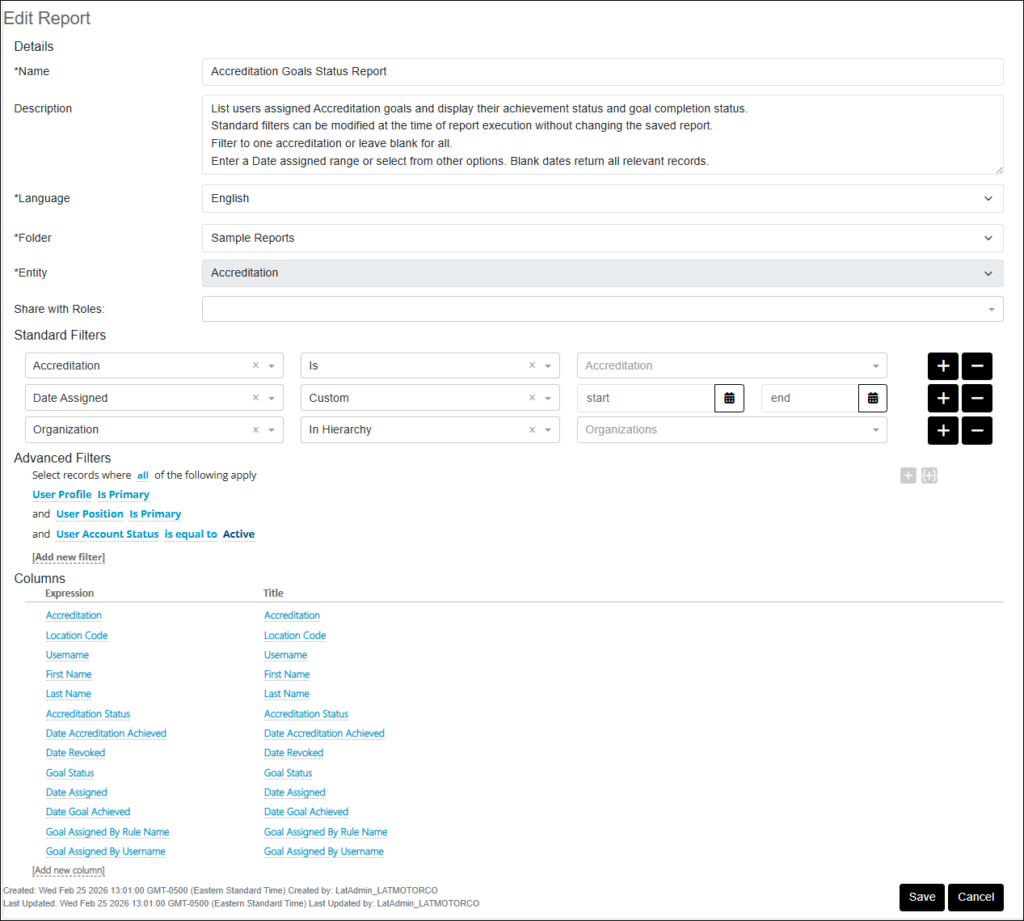
This section helps identify the report and determine which roles besides portal administrator have access to run the report in Report Writer.

  • Name: Provide a meaningful title for the report.
  • Description: Optional. This is useful for providing information about what the report is for and any tips on how to use the filters. The description will appear under the name in the report list.
  • Language: Defaults to English. 
  • Folder: Select the folder in which the report will reside.
  • Entity: Select Accreditation
  • Share with Roles: Once you have the report working as desired, you can share it to other roles, if desired. It will then appear for them when they open the Reports feature. Results will be scoped only to those learners that the logged in person has the rights to view.
  • Click Continue to move on to the Standard Filters section.

Add Standard Filters

Standard Filters are dynamic and you can change the values and even add more filters to the report when you run it without altering the saved version of the report.

The important concept to understand about Standard filters is that each filter listed is joined by an implied Boolean “AND” operator. This requires your filtering logic to be carefully constructed. You cannot add two standard filters  “Accreditation is Mechanical Level 1” AND “Accreditation is Mechanical Level 2” because there is no way one record can represent BOTH Accreditations. The filters are mutually exclusive and your report would show no results.

Standard filters can be set up but it’s not required to provide a value during setup. If left blank, the value can be entered during execution, or not entered at all – in which case, all relevant records would be returned.

Commonly Used Standard Filters

  • Accreditation “Is” [Blank] makes the report flexible when you run it. It will look for the users’  Accreditation status for one or more accreditations regardless of whether they were assigned as goals.
  • Goal “Is” [Blank] makes the report flexible when you run it. It will look for the users’ goal status for the selected Accreditation
  • Accreditation Status “Is’ or Goal Status “Is” can help you fine tune results to just those Achieved, or in another status.

To use more complex and detailed filters, you will need to consider advanced filters.

  • Use the dropdown list in the box on the left to select the filter.
  • Select the comparison such as “Is”, “Isn’t”, “Last 7 days” or whatever is available for each filter. 
  • Enter a value to filter for or leave blank to filter for all values or simply to let the report runner choose the value at the time the report is executed – this makes your report much more flexible over time.
  • Click “+” to add a filter or “” to remove it.

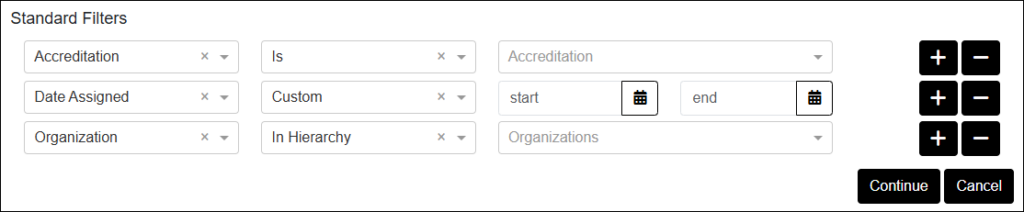
Click Continue to move on to the Advanced Filters.

Add Advanced Filters

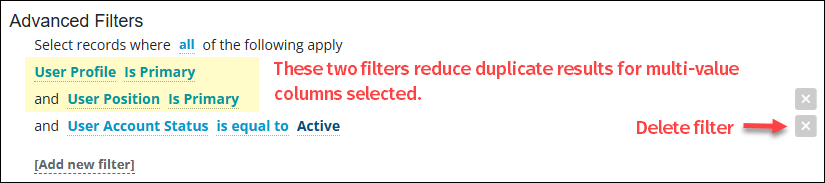
Advanced Filters let portal administrators define more complex criteria that will drive results data. These filters are “hard-coded” into the report and are not displayed to report runners. While Advanced Filters are optional, they can help fine-tune the expected or desired results. If you prefer a broad data extraction and plan to do more data manipulation in Excel or Access, you can limit the entries here or leave this section blank.

Advanced filters are very useful for:

  • Including/excluding active or inactive records
  • Listing multiple values to include/exclude (e.g. the “is in list” option)
  • Reducing duplicate result lines when multi-value columns list the same results more than once in order to show all the values for a user. (e.g. if a person has multiple positions or locations and you use position or location as a column)
  • Ensuring that elements of the report that should never vary are locked in for the report runners.

It is important not to create Advanced filters that logically conflict with the Standard filters. This is why describing the report and how it works in the Description is important for people using the report.

Commonly Used Advanced Filters

  • User Profile “is Primary” and User Position “is Primary” removed duplicate results that appear when using columns for which the user shown has multiple values such as location or position.
  • Accreditation IS [enter accreditation name] to hard code the report to ONE accreditation or Accreditation IS IN LIST [check the Accreditations from the type-ahead list, then click Apply to hard code the list to include.
  • Any Status filter that offers Active or Inactive as values can be used to restrict results to only that status, such as only active Users.

  • Click Add new filter to select an additional filter. Filters are sorted into categories to help find them more easily.
  • Select the comparison by clicking on the default comparison to see all options, such as “Is Primary” or “Is Equal to“. 
  • Select one or more values to target for filtering.
  • Delete a filter by clicking the “X“.

When ready, move to the Columns section.

Add Columns and Sorting

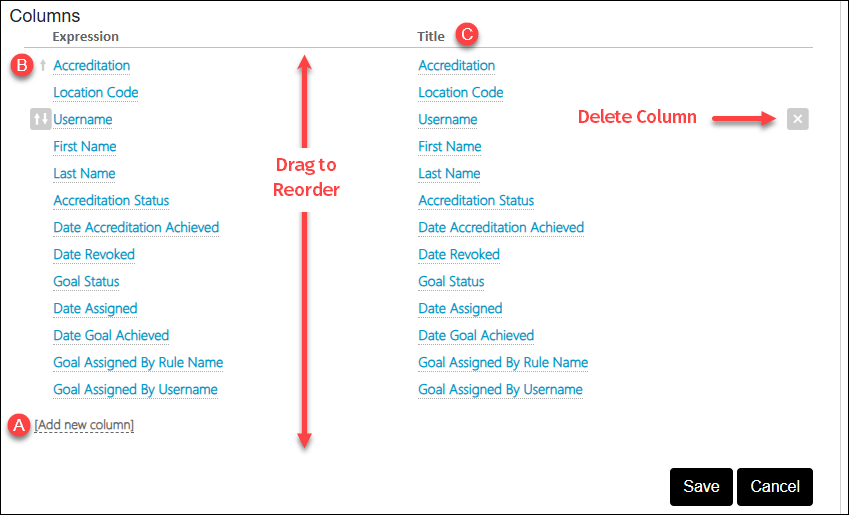
Decide which data you want to view in your results file and define each as a report Column. Consider how you want to sort them and make sure your primary sort column is before any secondary sorting. 

In addition to sorting, once listed, you can rearrange columns by dragging and dropping them into a new position. You can also change the name of the column from its default expression to the title you wish to appear on the report output.

  • Click (A) [Add new column ] to select an element. Reports must have at least one column to save. 
  • Drag and drop columns into the desired order.
  • To sort based on a particular column, hover to the left of the column expression (B) to display a sort menu. Secondary sorting should be done by columns below the primary.
  • To change the displayed title of the column (C), click the name and enter new text.
  • Delete columns by clicking “X“.

When you are finished, click Save. If you are finished, click Finish. You should then run your new report to test it for accurate results. 

Try It Yourself

Accreditation Goals Status Report

Achieved Accreditations by Accreditation

Use this as an example to create a flexible report that can find both the learners’ Accreditation Achievement status and Accreditation Goal Status for a specific accreditation or accreditation goal regardless of the status. You could add either status as a standard filter to help restrict results to a specific status.


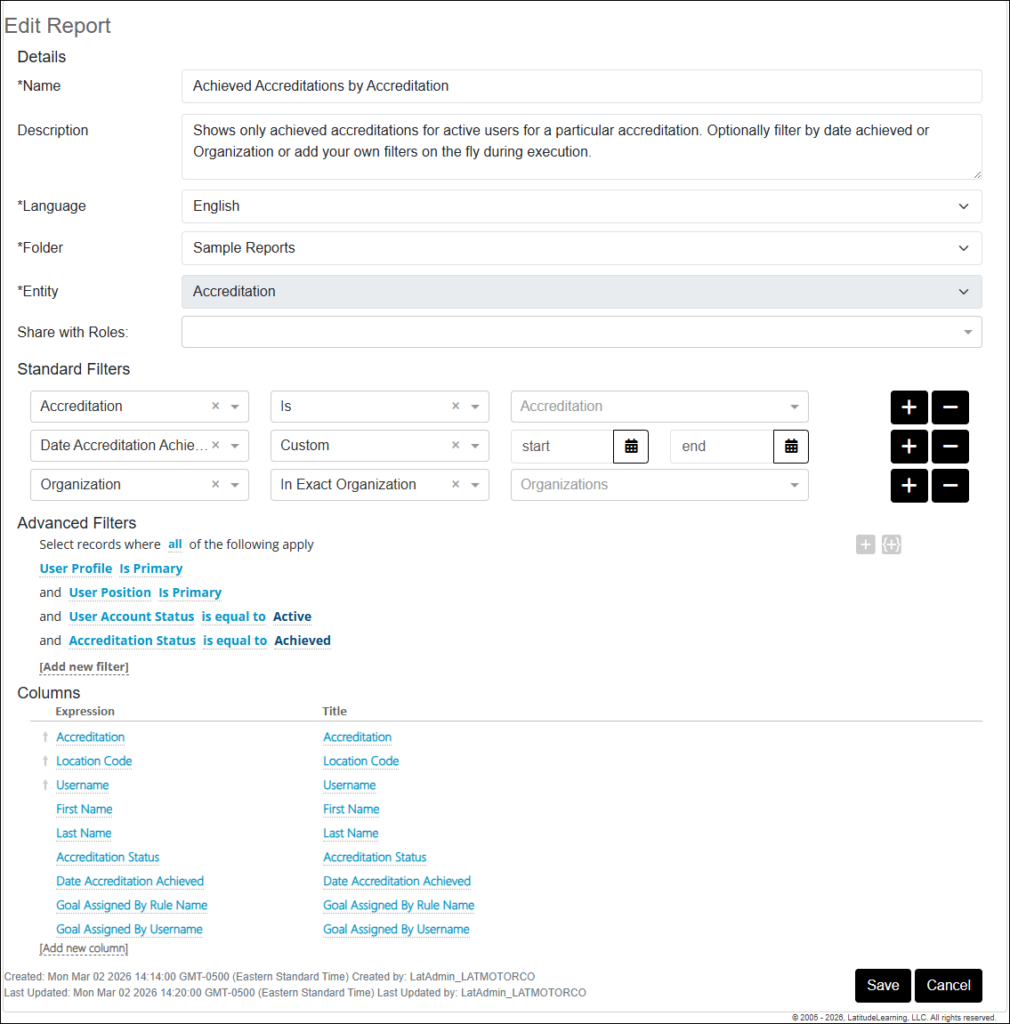
Use this as an example to create a report that shows only achieved accreditations for active users for a particular accreditation of your choosing. You can also use filters to restrict results by Date Achieved, Organization, and more.