Manage Classroom Instructos

Instructors can be qualified to teach specific courses, set up offerings, and manage rosters before, during, and after instructor-led training, in person or online. Learn how to set up your team of instructional experts!

Feature Overview and Requirements

Instructor is an LMS role for people who teach instructor-led course offerings, whether in person or online via webinars are via our Adobe Connect virtual classroom add on.

Instructors can be set up in a variety of ways:

  • During Add User, a popup asks about making an instructor appears after saving the user.
  • From the Edit User page by simply adding an Instructor role to an existing profile.
  • From the Administration page under Users > Instructors page

Updates performed in one of the options will reflect when viewing the other options. 

The instructor profile is part of the User account record and the role is one of the more powerful in the LMS. In addition to being to associate instructors with classroom offerings, instructors can perform a variety of powerful roster management actions before and during the training … and roster processing after to manage attendance, scoring, and passing status.


Step by Step Procedure and Field Description

The sections below will cover the primary areas in which you can add and maintain Instructors.

Manage Instructors from the Instructor Page

Add or maintain instructors from the dedicated Instructors page:

  1. From the Administration page, navigate to Users > Instructors.
  2. On the Instructors page you have two options:
    • Search for an Existing Instructor to Edit – filter for the instructor by name, course, language, or facility, then update the relevant data.
    • Add a New Instructor – Click the +Instructor button in the upper right corner to open a form. This is the step we will follow in the rest of this section.
  3. In the Add Instructor form, provide information as described below and shown in the Add Instructor screenshot.
    • User: Click Select User to choose the person you want to make an instructor.
    • Training Facilities: (optional) Click Select Facilities to choose one or more facilities in which the instructor could be given teaching assignments.
    • Instructional Language: Defaults to English. Check the languages in which this instructor can teach.  
    • Qualifications: (optional) A free text field to note any particular qualifications the instructor has.
    • Availability: (optional) A free text field to note general days and times the instructor is available. It is informational only and does not impact the ability to schedule them at other times.
  4. Under Courses, click Add Courses to list any specific courses that the instructor is qualified to teach.
  5. Under Billing Rates, two optional fields allow you to note an instructor’s billing rates for Classroom and Other activities. This is informational.
  6. Click Save. An Instructor tab will be added to the Edit User page with the same information entered above. To modify data at any time, you can do it via the Instructor Search page or from the user’s Account.

Manage Instructors from the User Side

Add an Instructor Profile When Adding a New User
  1. Add the new using according to the steps on the Add and Edit Users Manually page.
  2. After saving the form, you are presented with a confirmation popup that offers additional actions.
    Select I want to make this user an instructor then click OK.
  3. This opens an Add Instructor form exactly like that used and documented in the section above Manage Instructors from the Instructor Page. Complete the form as described in that section then click Save.
  4. After saving, the confirmation/action popup reappears. Select another action or keep the default I’m finished and click OK.
  5. You will then see the User Details page with an additional tab for Instructor Profile. You can modify the Instructor details from this tab whenever necessary.
Add an Instructor Profile By Updating an Existing User’s Profiles

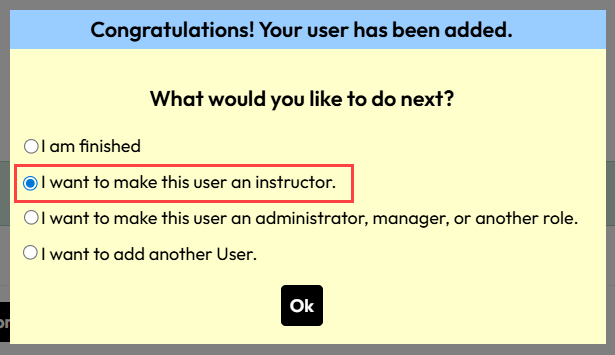
For an existing user, you can add an Instructor role at any time by adding the role to one or more of the user’s profiles.

  1. From the Administration page, navigate to Users > Users.
  2. Use the search page to find the user you wish to make an instructor, then select Edit User Profiles.
  3. Open the Profiles tab.
  4. Find the profile to which you want to add the instructor role, if there is more than one available. Click Edit Profile.
  5. Scroll down to the Roles section and click +Add a Role
  6. Next to Role, click Select a Role and choose the Instructor role from the picker.
  7. When you return to the Positions tab, you must click the Add Role button to keep the change.
  8. Click Save at the bottom of the page. When you refresh the page or return to it after navigating away, the Instructor Profile tab displays and you can complete the fields as described in the previous section.
Add an Instructor Profile During User Import

When using the User Import process, you can include an entry in the Instructor column of the standard user import template. 

For any row on the template in which the new user should get an Instructor profile, simply enter Yes in the column exactly as shown with no leading or following spaces.  Non-instructor rows should be left blank under Instructor.

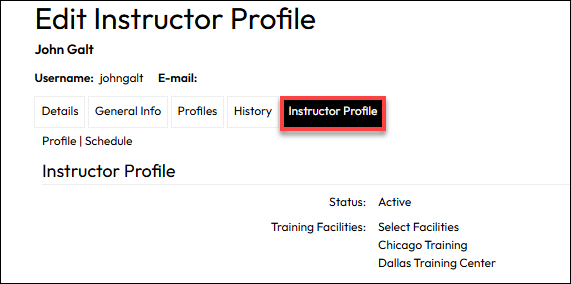
When the import completes, you will be able to edit the Instructor Profile tab on the User Details page to include all the relevant information described above.