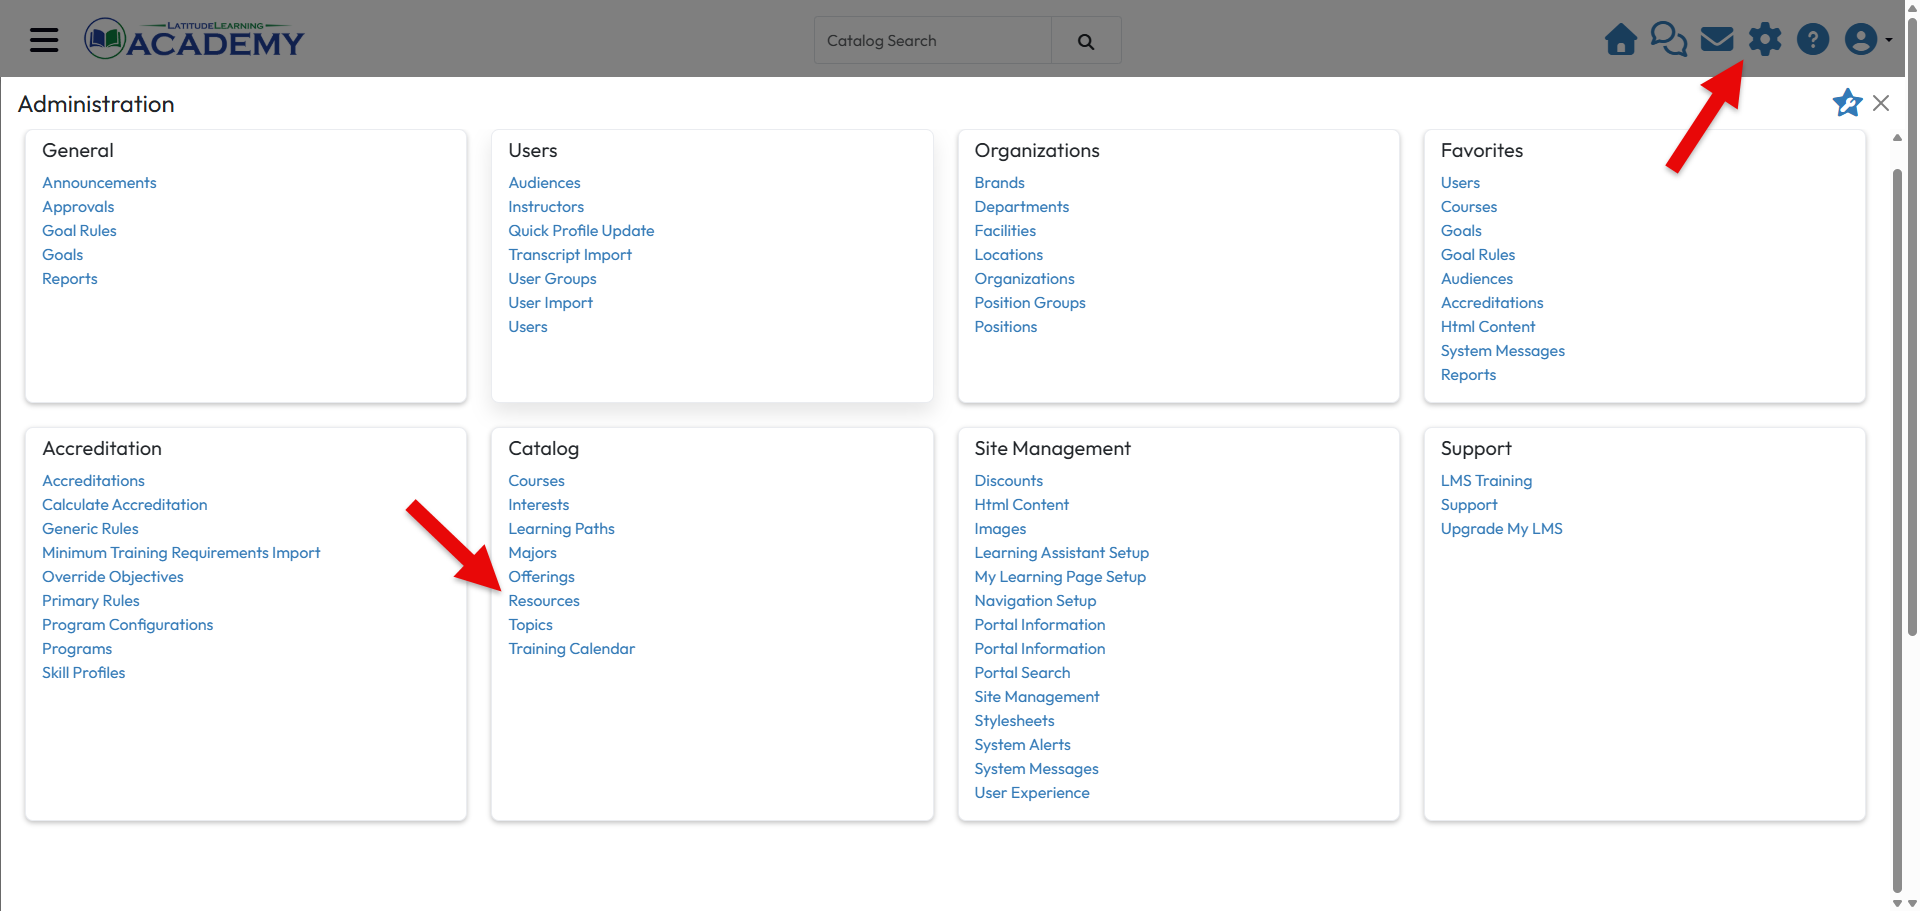
1. Open Resources
Click the Gear icon to open the Administration menu, then navigate to Resources.
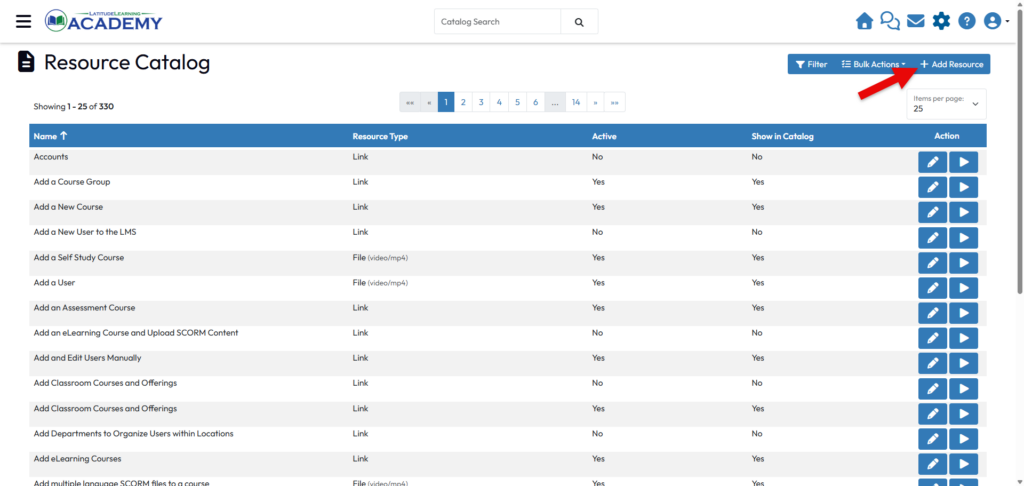
2. Create a Presentation Resource
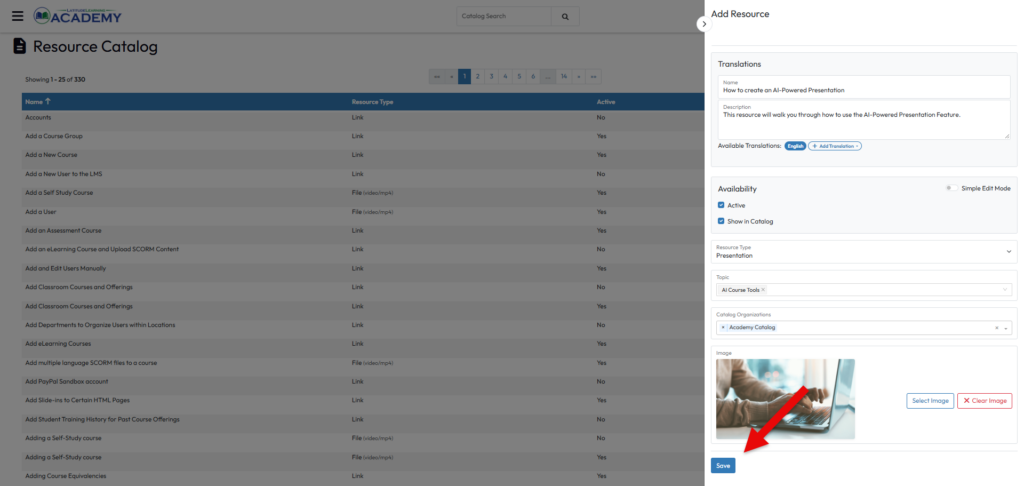
Click Add Resource.
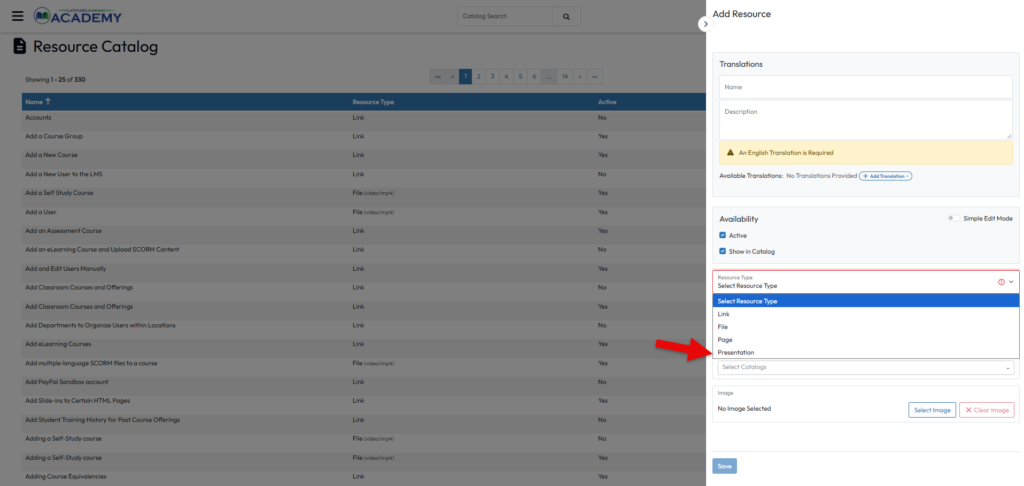
Select Presentation as the resource type. You will need to complete all the required resource fields and click Save before you can continue with your presentation creation. For details about the resource fields, see Manage Resources.
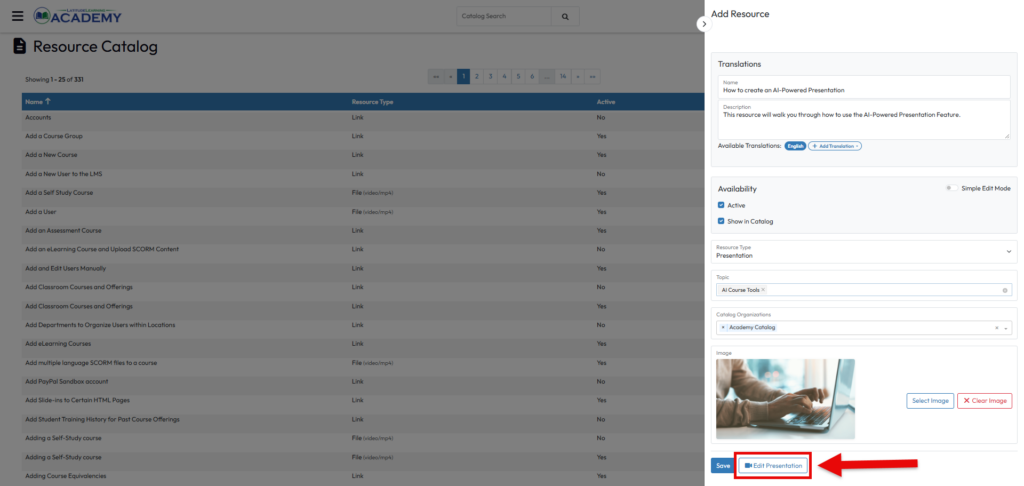
3. Open the Presentation Editor
After saving, click Edit Presentation to create and manage your presentation scenes.
4. Add Scene
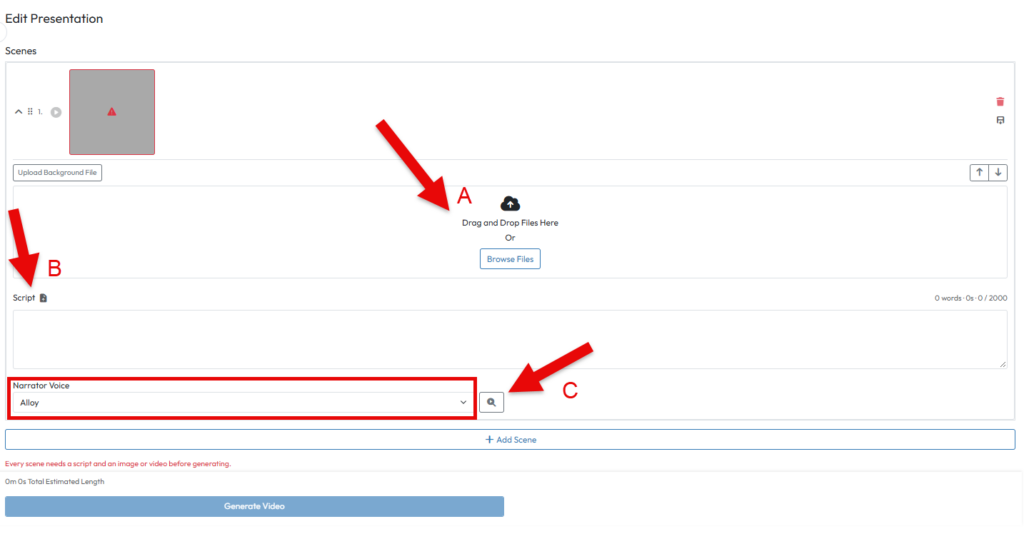
In the presentation editor, click the Add Scene button.

A. Browse Files or Drag and Drop Files – Upload an image or video for the scene background. Videos must be no larger than 100 MB and their original sound will not be used.
B. Script – Type or upload the script narration. Each scene script can be a maximum of 2000 characters.
C. Narrator Voice – Choose a Narrator Voice from the drop-down menu and click Play to preview it.
5. Add Additional Scenes and Transitions
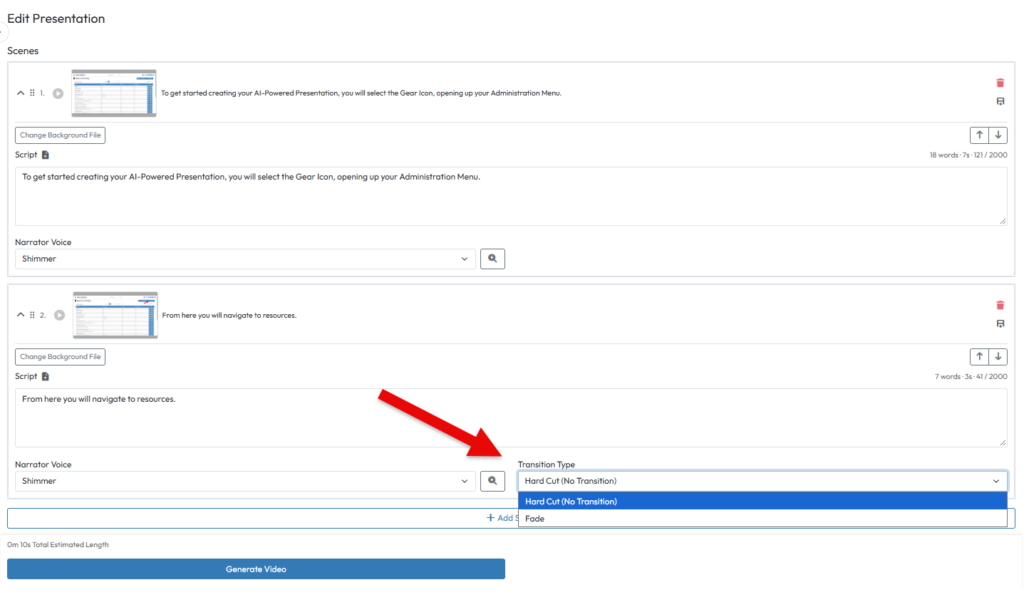
Click Add Scene again to continue building the presentation. For each additional scene, the narrator voice is copied from the prior scene and a Transition Type from the prior scene can be selected. Transition options include Hard Cut (No Transition) or Fade. Note, there is not a Transition Type selection for the first scene; this will show up in subsequent scenes.
6. Editing Scenes
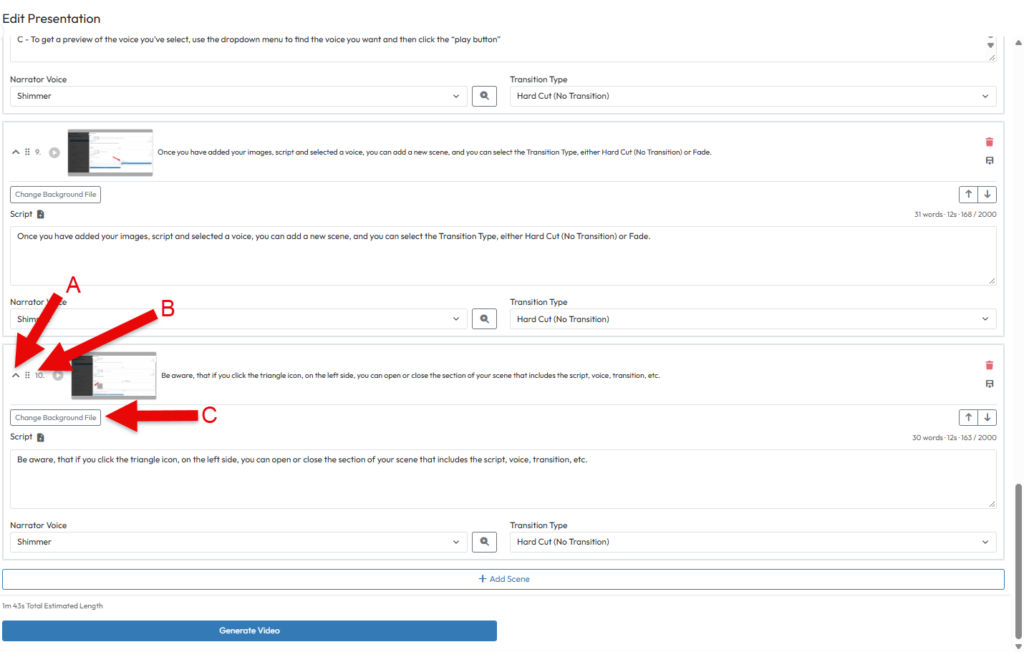
A. Expand Triangle – Click the triangle icon at the left of a scene to expand or collapse the scene settings.
B. Reorder Icon – Drag the dotted handle to reorder the scenes.
C. Change Background File – Click this button to upload a new image/video for a scene.
7. Generate the Video
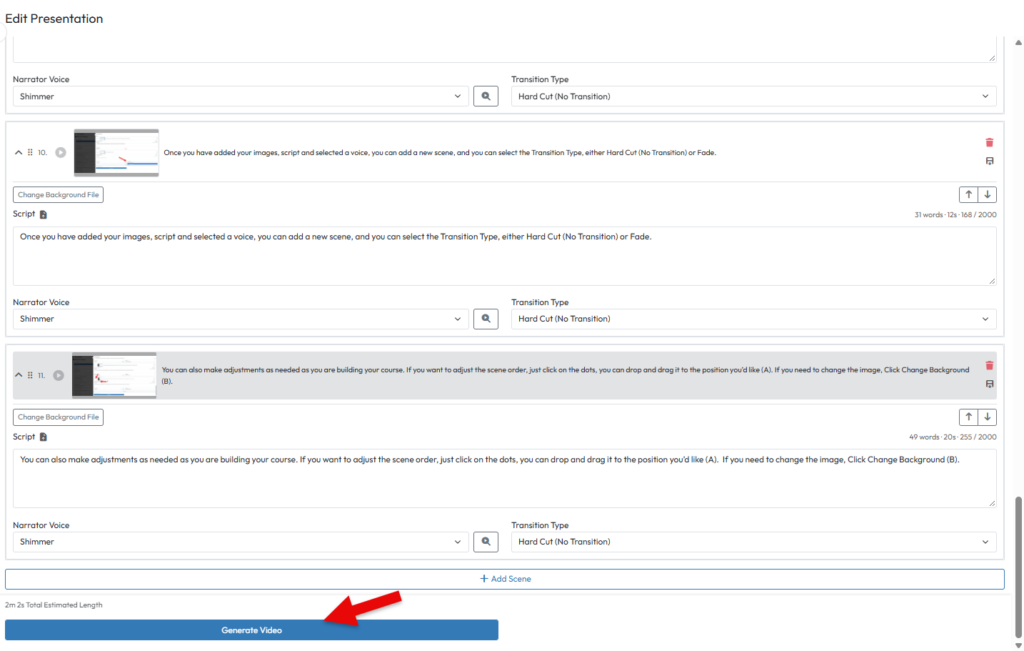
When the scenes are ready, click Generate Video. Generate video will not be enabled if an image/video has not been uploaded or if a script has not been entered.
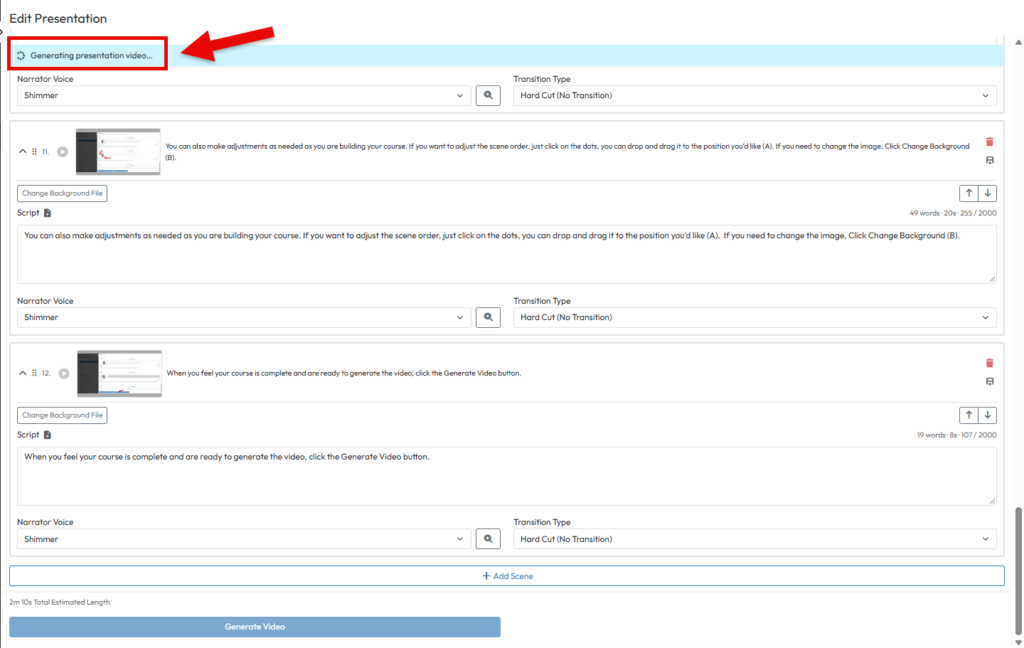
A ‘Generating presentation video….’ message is displayed while generation is in progress.
8. Review and Revise
Play the generated presentation and review the visuals and narration.
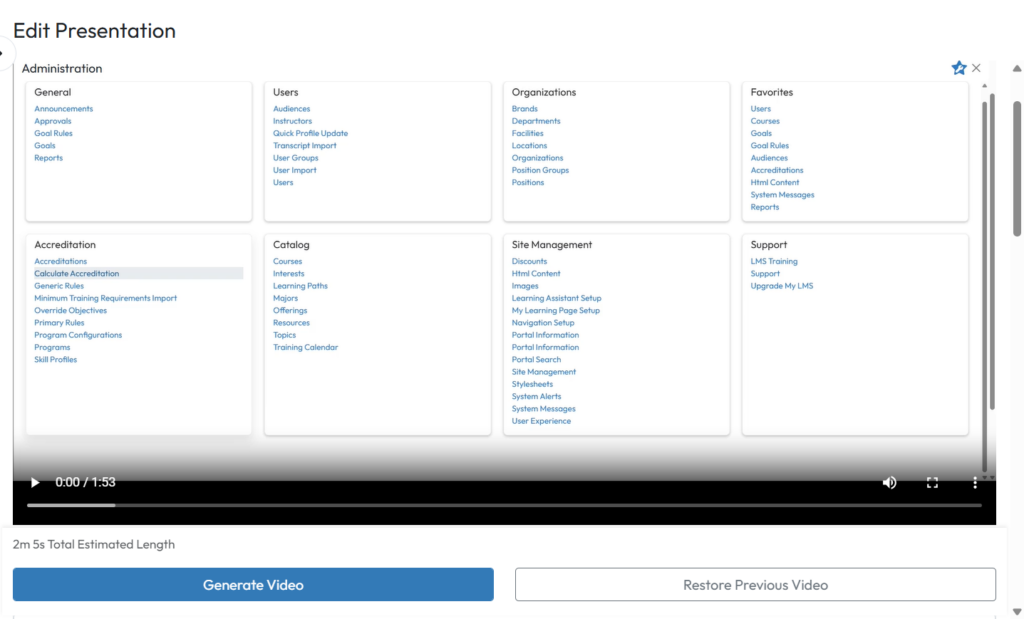
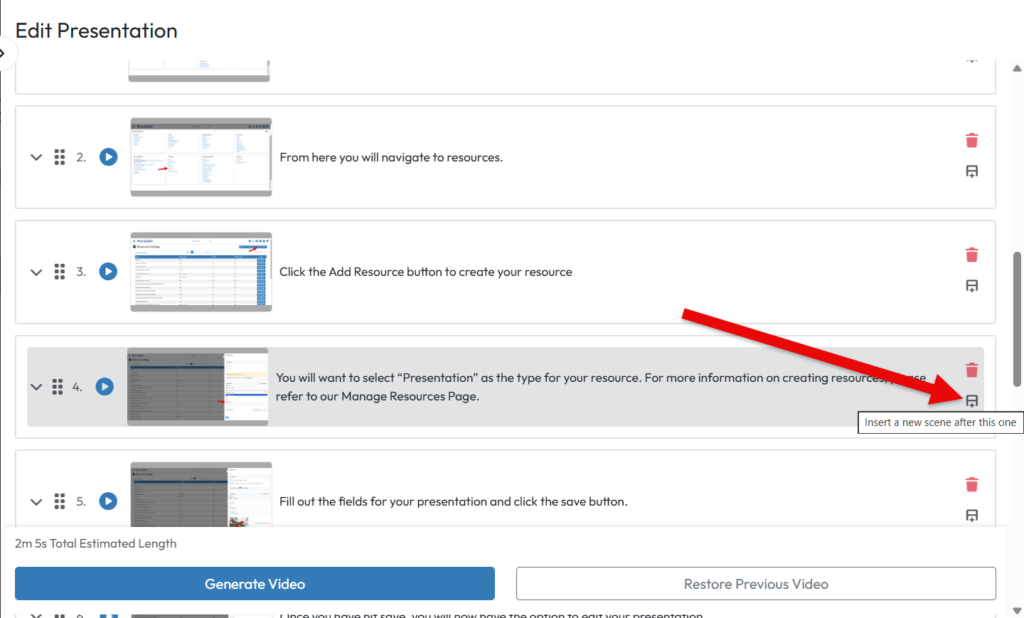
If changes are needed you can add new scenes, remove existing scenes, or expand a scene to edit the image/video, script, voice narration, or transition type. On the right side of each scene is an Insert icon and a Remove icon. Insert will add a scene directly after the current scent.
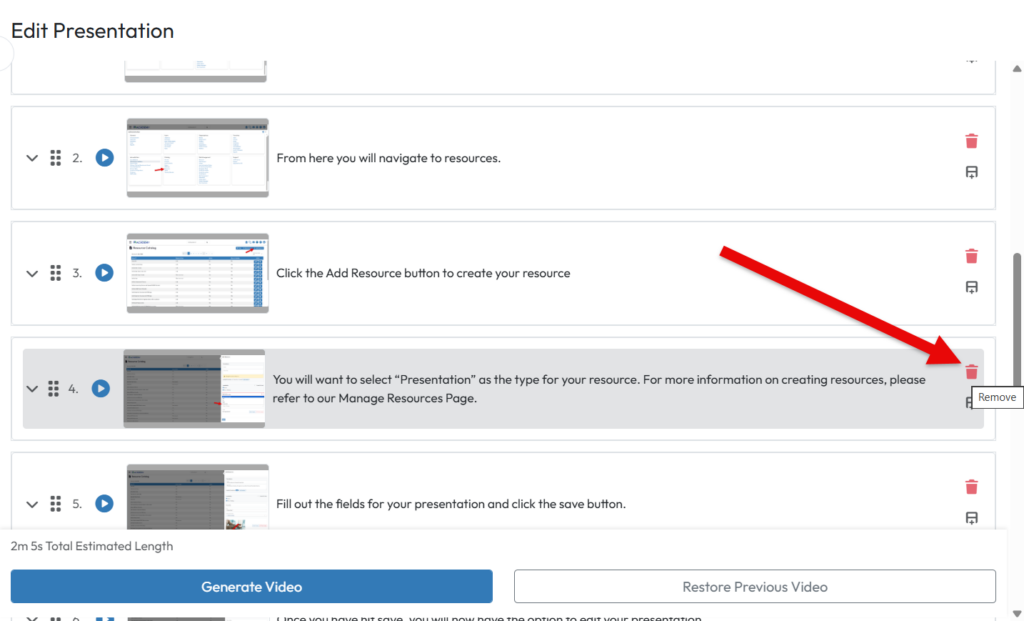
The Remove Icon will immediately remove the selected scene.
Once all edits are complete, click Generate Video again to incorporate the changes made.
Download the Presentation and Transcript
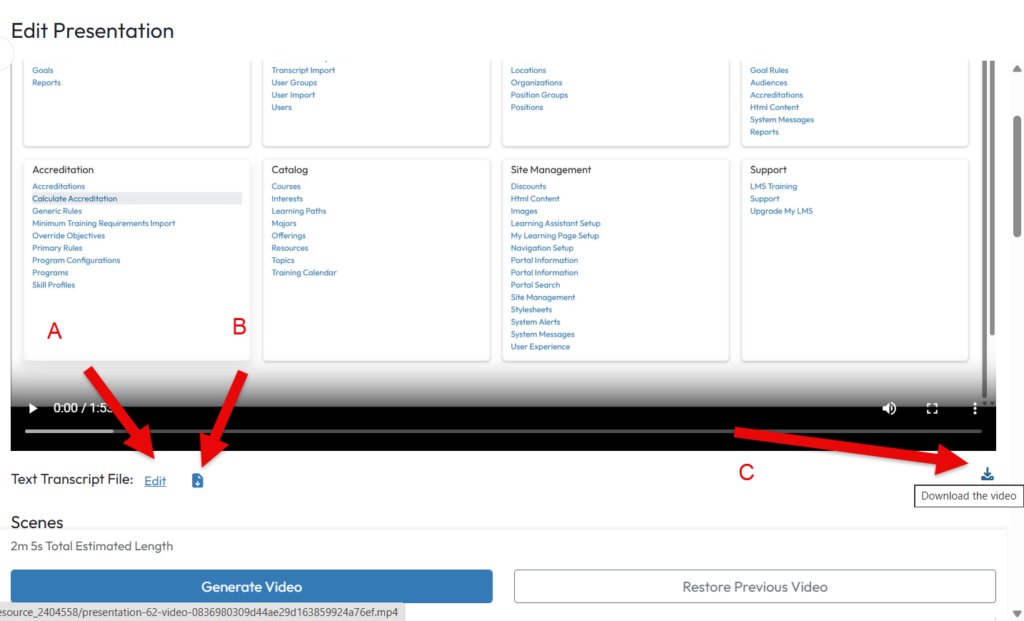
Once you have completed your presentation there are options to download and edit the current transcript and download the video for use elsewhere.
Changes made to the transcript will not be reflected in the current, saved script or video presentation. You can download the video for use elsewhere or use the presentation resource in LatitudeLearning.
A. Edit the Transcript – Clicking this options opens a free format text page with the current transcript displayed. Changes made are not reflected in any of the scene scripts or video presentation.
B. Download the Transcript – Allows you to save the current transcript as a text file.
C. Download the Video – Allows you to download your video presentation to use outside of the LatitudeLearning platform.
Restore Previous Video
The Restore Previous Video button will allow you to restore the last generated video prior to the currently saved video presentation. This does not restore earlier scripts, background files, or images. It simply restores the last generated video.
If this presentation is part of a lesson-based course where learners are actively enrolled and in progress, and the Restore Previous Video button is clicked, a warning will display showing how many learners will be impacted and forced to start the lesson over.
Add the Presentation to a Self-Study Course
Create or edit a course
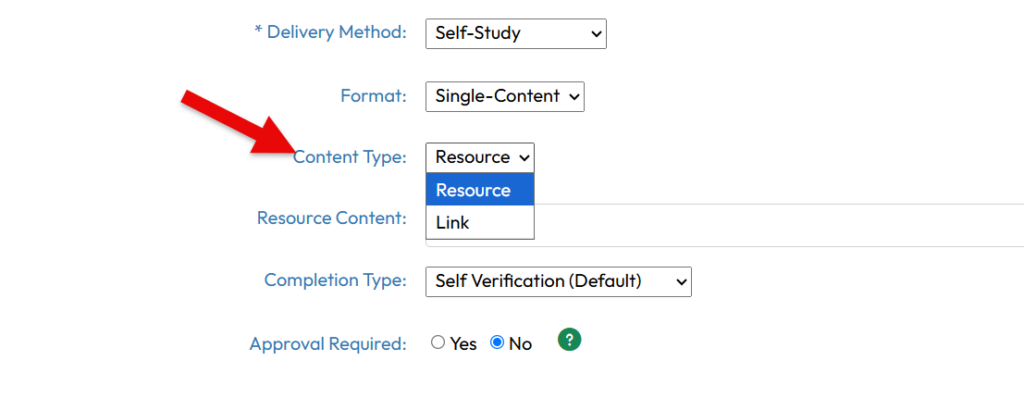
Navigate to Courses and create a new course or edit an existing one. Under Delivery Method, select Self-Study. See Add a New Course and Foundations: Types of Catalog Content for related guidance.
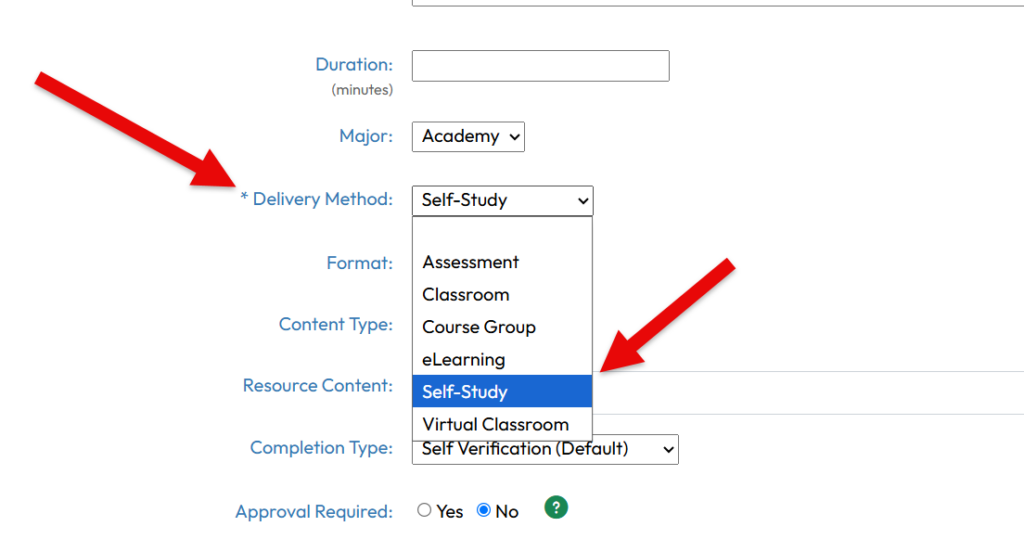
Under Content Type, select Resource and in Resource Content select the presentation video resource you created.
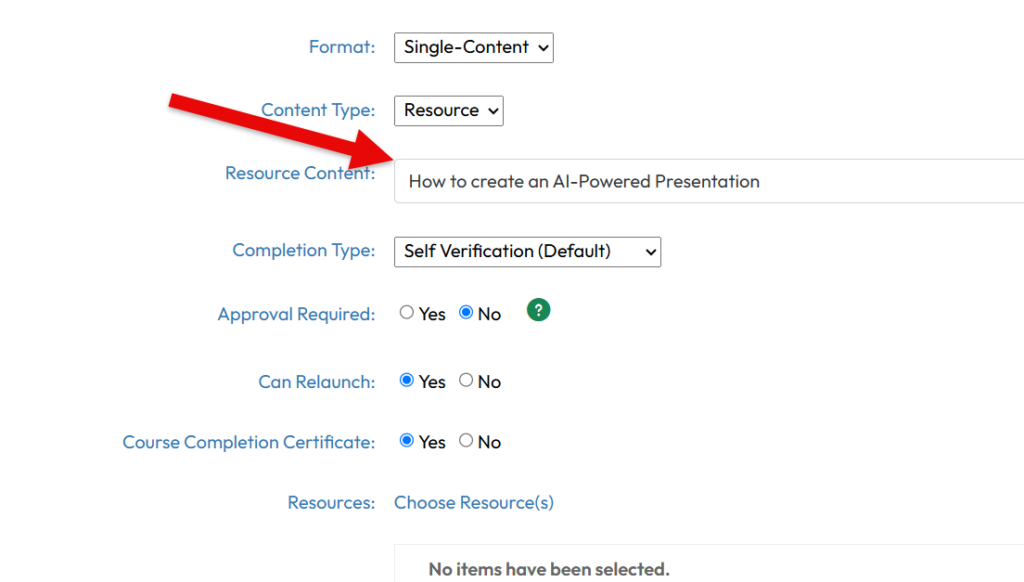
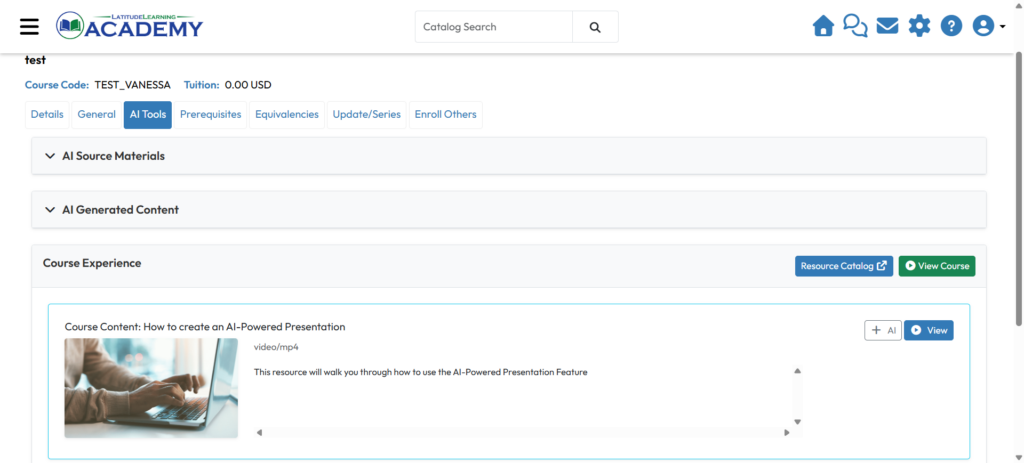
Scroll to the bottom and save the course. To view the course and how it will be displayed to learners, navigate to the AI Tools tab and in Course Experience, click View Course. To configure additional supporting materials such as Study Guides, Course Coach, or Assessments, see Configure Self-Study AI Tools for more information.